
Creating a masterpiece Stitch Cake combines creativity, precision, and love for Disney’s charming character, Stitch. This guide explores everything from crafting the perfect sponge base to decorating techniques that make your cake a showstopper. Whether you’re a beginner or a seasoned baker, this article covers all aspects to bring your Stitch Cake to life. Now, let’s delve into the details with Part 1.
Part 1: Introduction to Stitch Cake
What is a Stitch Cake?
A Stitch Cake is a whimsical and creative dessert inspired by Stitch, the beloved character from Disney’s Lilo & Stitch. Known for his mischievous grin and playful personality, Stitch has become a popular theme for children’s birthday cakes and celebratory events. These cakes capture the essence of the character with vibrant designs and intricate details.
Popularity and Appeal of Stitch-Themed Cakes
Stitch Cakes have surged in popularity, especially for kid-centric celebrations. These cakes not only highlight creativity but also evoke a sense of joy and nostalgia. From vibrant blue tones to 3D fondant figures, the design options are endless, making them a preferred choice for parents and fans of all ages. Beyond aesthetics, these cakes offer an opportunity to experiment with flavors, textures, and decorating techniques.
The allure of a Stitch Cake lies in its ability to bring a beloved character to life while serving as a delicious centerpiece for any party. With the right planning, tools, and inspiration, anyone can create a cake that will leave guests in awe. Next, we’ll explore the origins and inspiration behind these delightful cakes.
Part 2: (Stitch Cake)Origins and Inspiration
The Character Stitch from Disney’s Lilo & Stitch
Stitch, an alien experiment with a heart of gold, made his debut in Disney’s 2002 animated film Lilo & Stitch. His mischievous antics and eventual transformation into a lovable companion have cemented his place in pop culture. For bakers and cake enthusiasts, Stitch represents a playful and colorful theme that sparks creativity.
The blue fur, large expressive eyes, and quirky ears make Stitch an ideal muse for cake designs. Fans often recreate his likeness in fondant, buttercream, or edible toppers, capturing his charm on edible canvases.
Influence of Stitch on Cake Design
The vibrant visuals and heartwarming story of Lilo & Stitch inspire many bakers to experiment with their skills. Cake artists often incorporate Hawaiian motifs like flowers and leaves, reflecting the tropical backdrop of the movie. Stitch-themed cakes range from simple buttercream decorations to elaborate 3D sculptures that showcase the baker’s craftsmanship.
Moreover, the versatility of Stitch Cake designs ensures they cater to various skill levels. Beginners might opt for a flat buttercream design with edible prints, while advanced bakers create realistic models or intricate fondant decorations. With limitless possibilities, Stitch Cakes are a delightful challenge for anyone passionate about baking and design.
Up next, we’ll dive into the planning process, ensuring your Stitch Cake is as practical as it is stunning!
Part 3: Planning Your Stitch Cake
Choosing the Right Occasion for a unique Stitch Cake
Before you dive into creating a Stitch Cake, it’s essential to identify the occasion. These cakes are perfect for birthdays, themed parties, or even casual celebrations where Disney magic is welcome. Matching the cake’s design to the event’s tone helps set the stage. For a child’s birthday, bright colors and playful details work wonders, while a more minimalistic design may suit a casual gathering.
Selecting the Appropriate Cake Size and Shape
The size and shape of your Stitch Cake should align with the number of guests and the design you envision. For a small gathering, a single-tiered round or square cake might suffice. Larger events often call for multiple tiers or an extravagant 3D model. Using molds or carving techniques, you can shape the cake to mimic Stitch’s face or body, creating a true showstopper.
If you’re new to sculpting cakes, don’t fret. Pre-shaped molds or simpler designs can still yield impressive results while easing the baking process.
Deciding on Flavors and Fillings
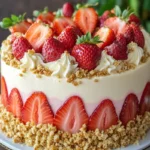
While the exterior of a Stitch Cake grabs attention, the flavors inside ensure it’s a hit. Popular options include vanilla, chocolate, red velvet, or even tropical flavors like coconut and pineapple, which nod to Stitch’s Hawaiian roots. For fillings, consider pairing the cake flavor with complementary options, such as cream cheese frosting, fruit compotes, or chocolate ganache.
Choosing flavors that reflect the theme adds an extra layer of thoughtfulness. A pineapple filling paired with a coconut-flavored sponge, for example, creates a tropical-inspired treat that aligns with the Lilo & Stitch theme.
Next, we’ll discuss the tools and materials you’ll need to bring your Stitch Cake to life! 🎨🍰
Part 4: Essential Tools and Materials to bake a Declicious Stitch Cake
Baking Equipment Needed
Creating a flawless Stitch Cake starts with having the right baking tools. While your kitchen basics—mixing bowls, measuring cups, and spatulas—are a given, certain specialized items make the process smoother. Essential baking equipment includes:
- A sturdy cake pan (round, square, or specialty-shaped)
- An electric mixer for smooth batter consistency
- A cake leveler to achieve even layers
- A turntable for easy frosting and decorating
These tools ensure a professional finish and make the entire process far less daunting. If you’re attempting a sculpted cake, consider investing in carving knives and serrated blades for precise shaping.
Decorating Tools Specific to Stitch Designs
The magic of a Stitch Cake lies in its details, and these require specific decorating tools. A few must-haves include:
- Fondant rollers and smoothers for a polished surface
- Modeling tools for crafting Stitch’s face, ears, and features
- Piping bags and tips for intricate buttercream details
- Edible markers or gel paints for adding finishing touches
If you’re working with edible images or toppers, having scissors or cutters dedicated to food-safe projects is invaluable. These tools ensure your design is both accurate and easy to execute.
Recommended Ingredients for Best Results
The choice of ingredients significantly impacts the final result. For the cake base, opt for high-quality flour, fresh eggs, and premium butter for a moist and tender texture. Additionally:
- Use gel-based food colors to achieve Stitch’s signature blue without altering the frosting consistency.
- Invest in fondant or gum paste from trusted brands to avoid cracking or tearing during shaping.
- Select natural flavorings or extracts, such as vanilla bean or almond essence, for enhanced taste.
Having the right tools and materials not only simplifies the process but also elevates the overall quality of your Stitch Cake.
Next, we’ll explore the art of baking the perfect base, ensuring a strong foundation for your stunning design. 🍰
Part 5: Baking the Perfect Base
Recipe for a Moist and Fluffy Sponge Cake
The foundation of any Stitch Cake is a delicious, well-prepared sponge. Here’s a simple yet reliable recipe that works beautifully for carving and layering:
Ingredients:
- 2 ½ cups all-purpose flour
- 2 ½ tsp baking powder
- ½ tsp salt
- 1 cup unsalted butter (softened)
- 2 cups granulated sugar
- 4 large eggs (room temperature)
- 1 tbsp vanilla extract
- 1 cup whole milk
Instructions:
- Preheat and Prepare: Preheat your oven to 350°F (175°C). Grease and line your chosen cake pan with parchment paper.
- Combine Dry Ingredients: In a bowl, sift together the flour, baking powder, and salt. Set aside.
- Cream Butter and Sugar: Beat the butter and sugar in a mixer until light and fluffy. This step ensures a tender crumb.
- Add Eggs and Vanilla: Mix in the eggs one at a time, followed by the vanilla extract. Scrape down the sides for even mixing.
- Incorporate Dry and Wet: Alternately add the dry ingredients and milk, starting and ending with the dry mixture. Mix until just combined.
- Bake to Perfection: Pour the batter into the prepared pan and bake for 30-35 minutes or until a toothpick inserted in the center comes out clean.
Let the cake cool completely before leveling or carving it into your desired shape. A well-prepared sponge provides the ideal canvas for decorating.
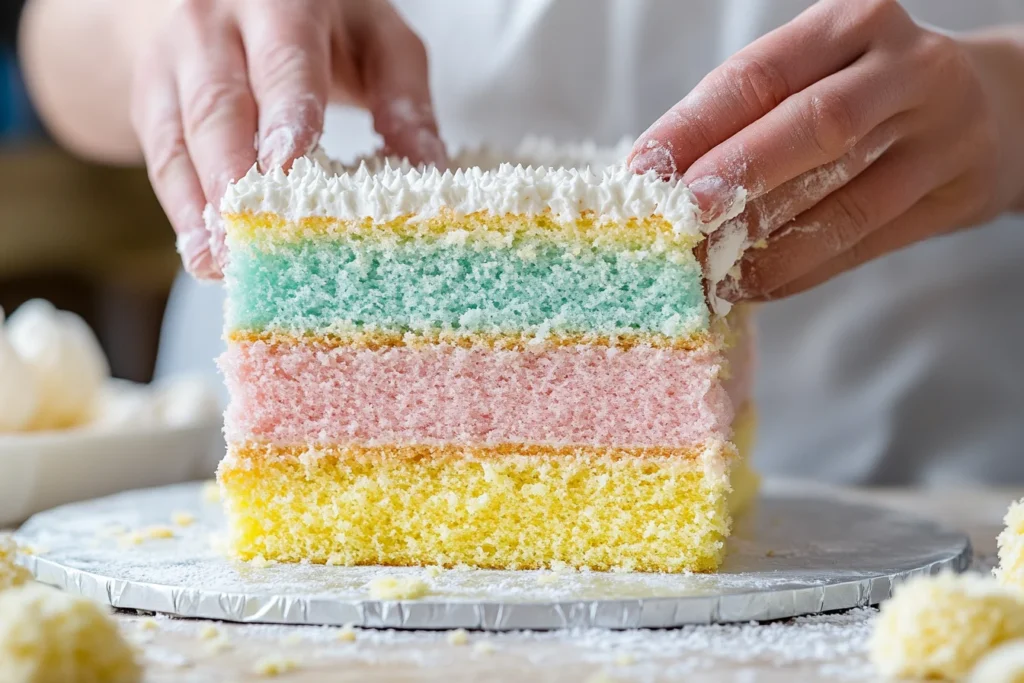
Alternative Cake Flavors Suitable for Stitch Cake
If you want to venture beyond classic vanilla, consider these alternatives:
- Chocolate Cake: Rich and decadent, it pairs beautifully with vanilla or fruity fillings.
- Red Velvet: A vibrant choice that adds a pop of color when sliced.
- Coconut Cake: Perfect for tropical themes, it complements Stitch’s Hawaiian connection.
Each of these options can be tailored with complementary fillings and frostings to match the event and personal preferences.
Tips for Leveling and Preparing the Cake Layers
A seamless Stitch Cake design starts with an even surface. To achieve this:
- Use a cake leveler or serrated knife to trim the dome from the top of the cake.
- Chill the cake for 20-30 minutes before carving to minimize crumbs.
- If stacking multiple layers, spread a thin crumb coat to secure loose crumbs before applying the final frosting.
Taking the time to prepare a stable and level base sets the stage for decorating success.
Next, we’ll dive into frosting and fillings, adding delicious layers to your Stitch Cake. 🍥
Part 6: Preparing the Frosting and Fillings
Buttercream vs. Ganache: Which to Choose?
The frosting is as crucial as the cake itself when creating a Stitch Cake. Choosing the right frosting depends on your design and flavor preferences:
- Buttercream Frosting: Ideal for smooth finishes and piping details, buttercream is versatile and easy to work with. Its light texture makes it suitable for most occasions, and it can be tinted to Stitch’s signature blue.
- Chocolate Ganache: For a richer taste, ganache provides a glossy, sophisticated finish. It works well as a base layer beneath fondant, ensuring a smooth surface.
Both options can be adapted with flavor extracts or coloring, allowing you to customize your cake effortlessly.
Step-by-Step Guide to Making Smooth Frosting
Here’s a foolproof recipe for buttercream frosting, perfect for decorating your Stitch Cake:
Ingredients:
- 1 cup unsalted butter (room temperature)
- 4 cups powdered sugar (sifted)
- 2-3 tbsp heavy cream or milk
- 1 tsp vanilla extract
- Gel food coloring (for Stitch’s blue tone)
Instructions:
- Cream the Butter: Beat the butter until smooth and creamy, about 2-3 minutes.
- Incorporate Sugar: Gradually add the powdered sugar, one cup at a time, mixing on low speed to avoid a sugar cloud.
- Add Liquid Ingredients: Stir in the heavy cream and vanilla extract. Beat on medium-high speed for 2-3 minutes until fluffy.
- Color the Frosting: Add a few drops of blue gel food coloring, mixing until the desired shade is achieved.
This frosting is perfect for crumb coats, piping, or as a base for fondant decorations.
Incorporating Fillings That Complement the Cake
Adding a filling to your Stitch Cake elevates its flavor profile. Some popular choices include:
- Fruit Compotes: Strawberry, raspberry, or pineapple compotes add a burst of freshness.
- Chocolate or Caramel Ganache: These fillings create a decadent, indulgent layer.
- Cream Cheese Frosting: A tangy and creamy option that pairs wonderfully with red velvet or vanilla cakes.
Spread the filling evenly between layers, ensuring it doesn’t spill out during assembly.
Next, we’ll explore how to assemble your cake, setting the stage for the decorating process. 🍰
Part 7: Assembling the Cake
Layering the Cake with Fillings
The assembly of your Stitch Cake is where structure meets creativity. To create a stable and visually appealing cake:
- Start with the Base Layer: Place the bottom layer of the cake on a sturdy cake board or turntable.
- Add the Filling: Spread an even layer of your chosen filling using an offset spatula, leaving a small margin around the edges to prevent spillage.
- Stack the Layers: Repeat the process with subsequent layers, ensuring each one is level before adding the next.
Taking the time to align the layers properly will result in a balanced cake that’s ready for decorating.
Crumb Coating for a Flawless Finish
A crumb coat is a thin layer of frosting applied to seal in loose crumbs, creating a smooth surface for the final decoration. Here’s how to do it:
- Use a spatula to spread a thin layer of frosting over the entire cake, focusing on covering any gaps or uneven areas.
- Smooth the frosting with a bench scraper or offset spatula, removing excess frosting as you go.
- Chill the cake for 20-30 minutes to allow the crumb coat to set.
This step ensures your final frosting or fondant layer adheres seamlessly to the cake.
Chilling the Cake for Stability
Chilling is crucial for both stability and ease of decorating. After applying the crumb coat:
- Place the cake in the refrigerator for at least 30 minutes to firm up the frosting.
- For 3D or sculpted cakes, chilling between carving or decorating stages helps maintain the cake’s shape and structure.
Proper chilling prevents slipping, sagging, or smearing, especially when working with intricate designs like Stitch’s face and features.
Next, we’ll cover the exciting part: decorating your Stitch Cake with techniques that bring your vision to life. 🎨🍰
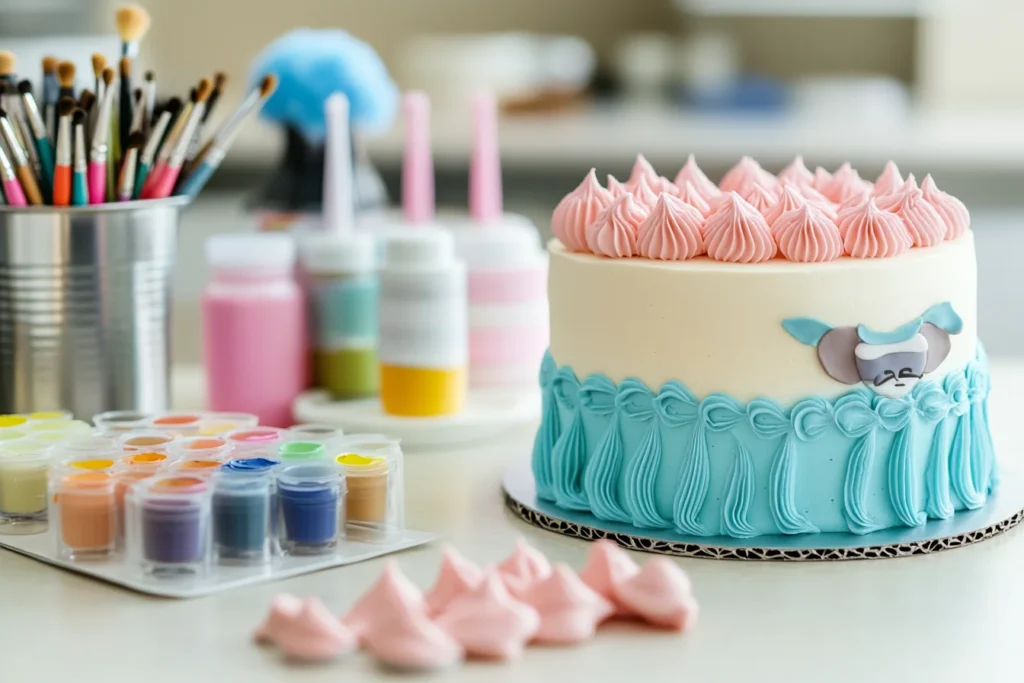
Part 8: Decorating Techniques
Working with Fondant: Tips and Tricks
Fondant is the star player when crafting a detailed Stitch Cake. Its pliable texture allows you to mold intricate features like Stitch’s expressive face and playful ears. To achieve a smooth finish:
- Roll Evenly: Use a fondant roller to achieve an even thickness, approximately ⅛ inch, to prevent tearing.
- Dust Your Surface: Lightly dust your workspace with cornstarch or powdered sugar to prevent sticking.
- Smooth It Out: After draping the fondant over your cake, use a fondant smoother to eliminate air bubbles and creases.
For Stitch’s face, mix blue and white fondant to create his signature color. Add black fondant for his eyes, nose, and mouth, layering the details for a 3D effect.
Creating Stitch’s Face and Features
Stitch’s face is the focal point of the cake, requiring careful attention to detail. Follow these steps for an eye-catching design:
- Shape the Face: Roll out blue fondant for the base of his face, cutting it into an oval or rounded rectangle.
- Add the Eyes and Nose: Use black fondant for his eyes and nose, shaping them into ovals and securing them with a small amount of water or edible glue.
- Craft the Ears: Shape two large blue fondant pieces for the ears, adding pink accents for the inner ear details. Attach them to the cake using wooden skewers for support.
You can add personality by adjusting Stitch’s mouth into a playful smile or mischievous grin.
Adding Details: Ears, Eyes, and Expressions
The small details bring your Stitch Cake to life. Use edible markers or gel paints to highlight Stitch’s eyebrows, teeth, and the shading around his eyes. For his fur details, a fondant modeling tool or veining tool can create realistic textures.
To make the design pop, consider adding edible glitter or shimmer dust to certain areas, giving Stitch a magical touch.
Using Edible Paints for Finishing Touches
Edible paints are perfect for adding color gradients and fine details. Mix gel food coloring with a few drops of clear alcohol or lemon extract to create a paint-like consistency. Use a fine brush for precision, shading areas like Stitch’s ears and cheeks to give depth and realism to the design.
Decorating a Stitch Cake combines technique and artistry, making it a rewarding experience that wows your guests.
Next, we’ll explore alternative decoration ideas for those seeking simpler or unique approaches to Stitch Cake designs. 🎨✨
Part 9: Alternative Decoration Ideas for a unique Stitch Cake
Buttercream Piping Techniques for Stitch Cake Designs
If working with fondant feels intimidating, buttercream offers a simpler yet equally impressive alternative. With the right piping tips and steady hands, you can create stunning Stitch Cake designs. Here’s how:
- Star Tip for Fur Texture: Use a star piping tip to replicate Stitch’s fur by layering short, overlapping strokes of blue buttercream.
- Round Tip for Facial Features: A round tip is perfect for piping Stitch’s eyes, nose, and smile directly onto the cake.
- Petal Tip for Decorative Borders: Add finishing touches with piped borders or floral accents around the cake’s edges.
Buttercream designs are great for beginners or when you’re short on time but still want a personalized touch.
Using Edible Images and Toppers
Edible images or pre-made toppers provide a quick and professional-looking option for decorating. Here’s how to use them:
- Purchase edible prints of Stitch’s face or themed artwork from a specialty bakery supply store.
- Place the image directly onto a smooth buttercream or fondant surface for a seamless finish.
- Complement the edible image with simple buttercream accents or sprinkles to enhance the design.
Pre-made toppers, such as sugar figurines of Stitch, can be positioned on the cake for a 3D effect with minimal effort.
Incorporating Themed Accessories
For a unique twist, incorporate themed accessories that tie into the Lilo & Stitch universe. Some ideas include:
- Hawaiian Flowers: Use gum paste or fondant to craft tropical flowers like hibiscus or plumeria, adding a touch of island charm.
- Surfboards or Sand Details: Create edible surfboards or sprinkle crushed graham crackers to mimic sand.
- Mini Stitch Figurines: Arrange small plastic or edible figurines around the cake for a playful scene.
These alternative decorations allow you to adapt the design to your skill level and the event’s theme while still celebrating Stitch’s lovable character.
Next, we’ll tackle common mistakes and how to avoid them, ensuring your Stitch Cake turns out perfectly every time. 🎂🌺
Part 10: Common Mistakes and How to Avoid Them
Preventing Fondant Cracks and Tears
Working with fondant can sometimes be tricky, especially if it cracks or tears during application. To avoid this common issue:
- Keep Fondant Pliable: Knead the fondant thoroughly before rolling it out to ensure it’s soft and elastic.
- Avoid Over-Rolling: Rolling the fondant too thin makes it prone to tearing. Aim for a thickness of about ⅛ inch.
- Use a Humid Environment: Fondant tends to dry out in low humidity. Use a lightly damp cloth to cover it when not in use.
If cracks appear, smooth them out gently with a small amount of shortening or water.
Achieving the Right Color Shades
Getting Stitch’s signature blue color can be challenging if the wrong food coloring or technique is used. Here’s how to nail the shade:
- Use Gel Food Coloring: Gel colors are concentrated and won’t alter the texture of your frosting or fondant.
- Mix Gradually: Add coloring in small increments to avoid oversaturating the fondant or buttercream.
- Test Before Applying: Always test the color on a small portion to ensure it matches your desired shade.
Combining a touch of teal and a hint of purple with the base blue creates the perfect Stitch hue.
Ensuring Structural Stability to our Stitch Cake
Structural stability is crucial, especially for multi-tiered or 3D Stitch Cakes. To keep your cake sturdy:
- Use Dowels for Support: Insert wooden or plastic dowels into the bottom tiers to prevent the weight of the upper layers from collapsing the cake.
- Chill Between Steps: Refrigerating the cake after each stage, such as crumb coating or sculpting, helps maintain its shape.
- Secure Heavy Decorations: Use toothpicks or food-safe supports to attach large elements like Stitch’s ears or arms.
These precautions ensure your cake looks as stunning at the end of the event as it did when first presented.
Next, we’ll explore the best ways to serve and store your Stitch Cake, ensuring its flavors and appearance remain intact. 🍰✨
Part 11: Serving and Storing Your Stitch Cake
Proper Cutting Techniques
Cutting a Stitch Cake can feel daunting, especially when intricate designs are involved, but following these steps ensures clean and even slices:
- Use a Sharp Knife: A long, sharp knife with a smooth blade works best for slicing through fondant and multiple layers.
- Warm the Knife: Dip the blade in warm water and wipe it dry before each cut for smooth slices without sticking.
- Slice Strategically: For tiered cakes, disassemble the layers before cutting to prevent accidents and maintain stability.
Careful cutting preserves the cake’s design while ensuring each guest gets a beautifully presented piece.
Storage Tips to Maintain Freshness
Proper storage ensures your Stitch Cake stays fresh and visually appealing, even if prepared in advance. Here’s how to store it:
- Room Temperature: For cakes covered in fondant or buttercream, keep them in a cool, dry place for up to two days. Avoid direct sunlight, which can melt the decorations.
- Refrigeration: If the cake contains perishable fillings like cream cheese or fresh fruit, store it in an airtight container in the fridge. Allow it to come to room temperature before serving.
- Freezing Leftovers: To freeze, wrap individual slices in plastic wrap, then store them in a resealable bag. Cakes can be frozen for up to three months without compromising taste.
Shelf Life of Decorated Stitch Cakes
The shelf life of a Stitch Cake depends on its ingredients and storage:
| Cake Component | Shelf Life at Room Temp | Shelf Life in Fridge |
|---|---|---|
| Buttercream Frosting | 2 days | 1 week |
| Fondant Decorations | 3-4 days | 1 week |
| Perishable Fillings | Not recommended | 3-4 days |
Keeping these timelines in mind ensures your cake remains fresh and delicious while retaining its stunning appearance.
Next, we’ll dive into FAQs to address common questions about creating and decorating a Stitch Cake. 🎂💡
Part 12: Frequently Asked Questions (FAQs) about Stitch Cake
How can I make a Stitch-themed cake for a birthday party?
To make a Stitch-themed cake, start with a basic sponge cake recipe in your desired size and shape. Use blue fondant to craft Stitch’s face or buttercream piping for simpler designs. Add details like his ears, eyes, and nose using fondant, edible paints, or piped frosting. For a beginner-friendly option, consider using edible images or pre-made toppers of Stitch to decorate the cake effortlessly.
What are some design ideas for a Lilo & Stitch cake?
There’s no shortage of creativity when it comes to Lilo & Stitch cake designs! Here are a few ideas:
- 3D Stitch Cake: Sculpt a cake into Stitch’s shape for a show-stopping centerpiece.
- Hawaiian-Themed Cake: Incorporate tropical flowers, surfboards, and beach-inspired elements to tie into the movie’s Hawaiian setting.
- Stitch Face Cake: Use blue buttercream or fondant to create a close-up of Stitch’s face, complete with his signature ears and mischievous grin.
- Layered Thematic Cake: Add tiers with different scenes or characters from Lilo & Stitch.
These designs can be tailored to match the occasion and the baker’s skill level.
Where can I find tutorials for modeling Stitch cake in fondant?
For step-by-step instructions on modeling Stitch in fondant, check out online resources such as:
- YouTube Tutorials: Search for videos by expert bakers showcasing the process.
- Cake Decorating Blogs: Websites like Wilton offer detailed guides for fondant work.
- Specialized Courses: Enroll in cake decorating classes on platforms like Udemy or Craftsy, where you can learn advanced techniques for creating character cakes.
These resources cater to all skill levels, ensuring you find the right tutorial for your needs.
Are there bakeries that offer custom Stitch cakes for delivery?
Yes, many bakeries offer custom Stitch Cakes for delivery. Local bakeries or specialized custom cake shops are great options. Additionally, online platforms like Etsy or Cakeify connect you with professional bakers who deliver personalized cakes directly to your door. Be sure to order in advance to allow enough time for the bakery to design and prepare your cake.
What tools and materials are needed to create a Stitch cake topper?
To craft a Stitch cake topper, you’ll need the following tools and materials:
- Fondant or Gum Paste: To shape and mold Stitch’s body, head, and features.
- Modeling Tools: For shaping and detailing small parts like eyes, ears, and mouth.
- Edible Paints or Markers: To add finishing touches and colors.
- Skewers or Toothpicks: For structural support, especially for 3D toppers.
- Cornstarch or Shortening: To prevent sticking while working with fondant.
These essentials make it easier to bring Stitch to life on your cake.
Next, we’ll conclude the article with a brief wrap-up. 🎂✨
Part 13: Conclusion
Creating a Stitch Cake is a delightful way to celebrate special occasions with a touch of Disney magic. From planning the design to baking the perfect base and adding intricate decorations, every step offers an opportunity to unleash your creativity. Whether you choose a detailed 3D sculpted masterpiece or a simple buttercream design, the joy of bringing Stitch to life is as rewarding as the final result.
With the right tools, materials, and a dash of imagination, your Stitch Cake will undoubtedly steal the show and leave your guests in awe. So gather your supplies, channel your inner baker, and let Stitch’s mischievous charm inspire your next creation!
Enjoy the process, and don’t forget to share your masterpiece with friends and family—it’s bound to be a hit! 🎉🎂


1 thought on “Enjoy The BEST Stunning Stitch Cake: Step-by-Step Guide”