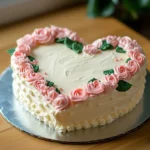
How Do You Make a Butterfly-Shaped Cake?
Creating a butterfly-shaped cake is easier than you think! Whether you’re baking for a birthday, a baby shower, or just a fun family gathering, this guide will walk you through every step. From choosing the right cake recipe to decorating with vibrant colors, you’ll learn how to turn a simple cake into a masterpiece. With the right tools, some patience, and creativity, your homemade butterfly cake will be the star of the party!
Now, let’s dive into the first part of this delicious journey.
Part 1: Introduction to Butterfly-Shaped Cakes
Why a Butterfly Cake? A Beautiful and Fun Baking Project
Butterflies symbolize transformation, joy, and beauty, making them a perfect theme for cakes. Whether you’re baking for kids or adults, a butterfly cake brings a whimsical touch to any occasion. Plus, its shape allows endless creativity with colors, patterns, and decorations.
Perfect Occasions for a Butterfly Cake
A butterfly-shaped cake fits many celebrations, including:
- Birthdays – A fun and colorful cake for kids and adults alike.
- Baby Showers – A charming centerpiece for welcoming a new life.
- Spring and Garden Parties – Celebrate nature with a beautifully decorated cake.
- Tea Parties and Special Events – Impress guests with a unique, themed dessert.
What You’ll Learn in This Guide
By the end of this article, you’ll know how to:
- ✔️ Choose the best cake recipe for a butterfly cake.
- ✔️ Cut and assemble the cake into the perfect shape.
- ✔️ Decorate it with frosting, fondant, and edible details.
- ✔️ Present your cake beautifully for any occasion.
Now that we’ve covered the basics, let’s start planning your butterfly cake!
Part 2: Planning and Preparation for a Butterfly-Shaped Cake
Before you start baking, it’s crucial to plan your butterfly cake properly. From choosing the best cake recipe to gathering the right tools, a little preparation ensures a smooth and enjoyable baking process. In this section, you’ll learn everything you need to get started!
Choosing the Right Cake Recipe for a Butterfly Cake
Not all cakes work well for shaping. You need a cake that’s firm enough to hold its shape but still moist and delicious. Here are the best cake types for a butterfly cake:
- Butter Cake – Sturdy and easy to carve, making it ideal for shaped cakes.
- Pound Cake – Dense texture prevents crumbling when cutting the shape.
- Sponge Cake – Lighter but still holds its structure well when cooled properly.
- Chocolate or Vanilla Cake – Classic choices that pair well with any decoration.
👉 Tip: Avoid overly soft or delicate cakes like chiffon or mousse-based cakes, as they might collapse when shaping.
Gathering Essential Tools and Materials
Having the right tools makes cake decorating much easier. Here’s what you’ll need:
Baking Essentials:
- ✔️ Cake pans (round or square)
- ✔️ Mixing bowls and a whisk
- ✔️ Electric mixer (for smooth batter)
- ✔️ Parchment paper (prevents sticking)
Shaping and Decorating Tools:
- ✔️ Sharp serrated knife (for carving the butterfly shape)
- ✔️ Cake board (for stability)
- ✔️ Offset spatula (for smooth frosting)
- ✔️ Piping bags and tips (for detailed decorations)
- ✔️ Food coloring (to create vibrant butterfly wings)
- ✔️ Fondant or edible decorations (for adding patterns)
👉 Pro Tip: If you’re not confident in freehand carving, print out a butterfly template and use it as a cutting guide!
Designing Your Butterfly Cake
Step 1: Decide on the Cake Shape
You can create a butterfly cake in two ways:
✔️ Two Round Cakes Method – Cut two round cakes in half and arrange them to form wings.
✔️ One Square Cake Method – Carve the shape from a single large cake.
Step 2: Choose Your Color Scheme
Butterflies come in endless colors! Think about these options:
- 🎨 Bright & Fun: Pink, blue, purple, yellow – perfect for kids’ parties!
- 🎨 Elegant & Subtle: Pastel shades for a more delicate look.
- 🎨 Realistic Touch: Inspired by real butterflies like monarchs or swallowtails.
Step 3: Plan the Decorations
🖌️ Pipe intricate wing details with frosting.
🍬 Use candies, sprinkles, or edible glitter for texture.
🌿 Add floral or nature-inspired elements for a garden look.
👉 Bonus Idea: Use edible shimmer dust for a magical, iridescent effect!
Part 3: Baking the Cake for Your Butterfly-Shaped Masterpiece
Now that you’ve planned your butterfly cake, it’s time to bake! The right baking techniques ensure a firm yet fluffy cake that’s easy to shape. Follow these steps carefully, and you’ll have a perfect base for carving and decorating.
Preparing the Cake Batter
A well-prepared batter is the foundation of a great cake. Here’s a simple yet delicious recipe for a sturdy vanilla butter cake, perfect for shaping.
Ingredients:
- ✔️ 2 ½ cups (315g) all-purpose flour
- ✔️ 2 ½ tsp baking powder
- ✔️ ½ tsp salt
- ✔️ 1 cup (225g) unsalted butter, softened
- ✔️ 2 cups (400g) granulated sugar
- ✔️ 4 large eggs
- ✔️ 1 tbsp vanilla extract
- ✔️ 1 cup (240ml) whole milk
Step-by-Step Instructions:
1️⃣ Preheat the oven to 350°F (175°C). Grease and line two 9-inch round cake pans with parchment paper.
2️⃣ Mix dry ingredients: In a bowl, whisk together the flour, baking powder, and salt. Set aside.
3️⃣ Cream butter and sugar: In a large mixing bowl, beat the butter and sugar together until light and fluffy (about 3 minutes).
4️⃣ Add eggs one at a time: Beat well after each addition. Mix in the vanilla extract.
5️⃣ Alternate adding dry ingredients and milk: Gradually mix in the flour mixture, alternating with the milk, beginning and ending with the flour. Mix until just combined.
6️⃣ Divide the batter evenly between the two prepared pans. Smooth the tops with a spatula.
Baking the Cake Layers
Proper baking ensures the cake is stable enough for carving. Follow these guidelines:
- 🔥 Bake time: 30-35 minutes or until a toothpick inserted in the center comes out clean.
- 🔥 Oven position: Place the pans on the center rack for even baking.
- 🔥 Cooling method: Let cakes cool in the pan for 10 minutes, then transfer them to a wire rack to cool completely.
👉 Pro Tip: A slightly firmer cake is easier to shape! For best results, bake the cake a day in advance and refrigerate it before carving.
Nutritional Information (Per 100g)
| Nutrient | Amount |
|---|---|
| Calories | 380 kcal |
| Carbohydrates | 50g |
| Protein | 5g |
| Fat | 18g |
| Saturated Fat | 11g |
| Sugar | 30g |
| Fiber | 1g |
| Sodium | 150mg |
Part 4: Shaping the Butterfly Cake 🦋🍰
Now that your cake layers have cooled, it’s time to transform them into a stunning butterfly shape! This step requires precision, but don’t worry—I’ll guide you through it so your cake looks symmetrical and beautiful.

Cooling and Preparing the Cake for Shaping
Before cutting the cake, follow these steps to ensure smooth shaping:
- ✔️ Chill the cake for at least 1 hour – A firmer texture makes carving easier.
- ✔️ Level the cake layers – Use a serrated knife to remove any dome-shaped tops for an even surface.
- ✔️ Prepare a cutting board or cake board – This will make assembling and decorating the cake easier.
👉 Pro Tip: If the cake feels too soft while cutting, freeze it for 15-20 minutes to firm it up.
Carving the Butterfly Shape
There are two main ways to create a butterfly shape. The round cake method is the easiest, so we’ll use that!
Step-by-Step Cutting Guide:
1️⃣ Cut both round cakes in half – You now have four semicircles.
2️⃣ Arrange the semicircles to form wings – Place two halves on each side, leaving a space in the middle.
3️⃣ Trim the inner edges slightly – This creates a curved wing effect.
4️⃣ Use leftover cake scraps – Shape a small piece for the butterfly’s body in the center.
🖌️ Visualizing the Butterfly: If unsure, lightly outline the cuts with a knife before slicing.
Assembling the Cake Pieces
- ✔️ Place the wings on a cake board – Arrange them symmetrically around the body.
- ✔️ Use a small amount of frosting – Apply a thin layer to “glue” the pieces together.
- ✔️ Check for symmetry – Adjust the wings if needed to ensure balance.
👉 Pro Tip: If any piece feels wobbly, insert a toothpick or dowel for extra support (just remember to remove them before serving!).
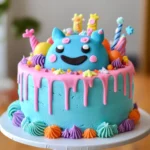
Part 5: Decorating Your Butterfly Cake 🎨🦋
Now that your butterfly-shaped cake is carved and assembled, it’s time to make it stunning with colorful frosting and decorations! This is where you can get creative and bring your butterfly to life. Whether you prefer a simple design or an intricate masterpiece, this guide will help you achieve a beautiful result.
Applying a Crumb Coat for a Smooth Finish
Before adding final decorations, apply a crumb coat to lock in crumbs and create a clean base.
How to Apply a Crumb Coat:
1️⃣ Prepare your frosting – Use buttercream or ganache for a sturdy base.
2️⃣ Spread a thin layer – Apply a light coat over the entire cake using an offset spatula.
3️⃣ Chill the cake – Refrigerate for at least 30 minutes to set the layer.
👉 Pro Tip: A crumb coat makes decorating much easier by creating a smooth foundation.
Frosting the Cake: Choosing Colors and Techniques
Best Frosting Types for a Butterfly Cake:
- ✔️ Buttercream Frosting – Soft, easy to color, and holds its shape well.
- ✔️ Whipped Cream Frosting – Light and airy but less stable.
- ✔️ Fondant – Great for a polished look but requires practice.
How to Frost Your Butterfly Cake:
1️⃣ Divide your frosting into separate bowls for different colors.
2️⃣ Use a piping bag or spatula to apply the base layer evenly.
3️⃣ Create texture by swirling patterns or using a star-tip nozzle.
👉 Pro Tip: If you want a gradient effect, blend two colors using an offset spatula!
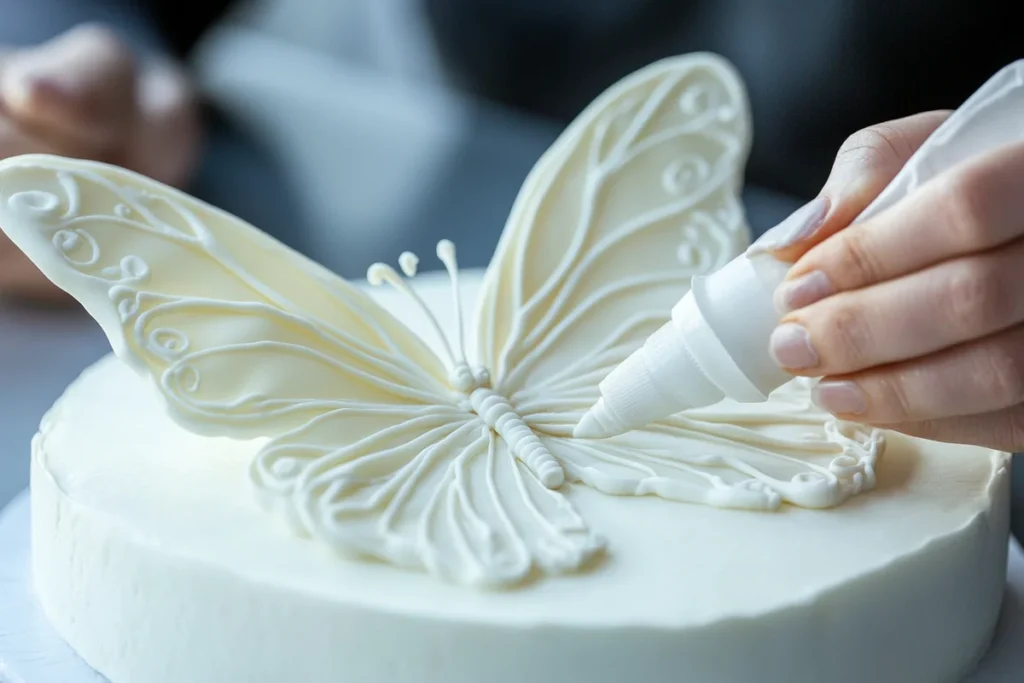
Adding Decorative Details to the Wings
Butterfly wings are vibrant, so have fun with patterns and colors!
Decoration Ideas:
🎨 Piping Designs: Use different tips to create swirls, dots, or lace-like textures.
🍬 Edible Decorations: Sprinkles, edible glitter, and chocolate chips add dimension.
🌸 Fondant Shapes: Cut out fondant flowers or polka dots for extra detail.
Step-by-Step Wing Decoration:
1️⃣ Outline the wing patterns with a toothpick for guidance.
2️⃣ Pipe the designs using contrasting colors for a striking effect.
3️⃣ Add embellishments like pearls, sprinkles, or shimmer dust.
Crafting the Butterfly’s Body and Antennae
The body of your butterfly cake can be made from various edible elements.
Options for the Body:
- ✔️ A rolled fondant cylinder
- ✔️ A chocolate-covered biscuit
- ✔️ A row of small round candies
How to Make Antennae:
1️⃣ Use licorice strips, pretzel sticks, or piped chocolate.
2️⃣ Curve them slightly for a natural look.
3️⃣ Attach securely with frosting or melted chocolate.
👉 Pro Tip: Add small candy eyes or a dusting of cocoa powder for extra detail!
Final Touches and Presentation
🎂 Place the cake on a decorative platter for a polished look.
✨ Add extra sparkle with edible glitter to make the wings shine.
🌸 Surround with fresh flowers or fruit for an elegant finish.
Part 6: Frequently Asked Questions About Butterfly Cakes 🦋❓
Many bakers, both beginners and experts, have questions about making a butterfly-shaped cake. Below, we’ll address the most commonly asked questions to help you troubleshoot issues and improve your cake-making skills.
Can I Use a Cake Mix Instead of Baking from Scratch?
Yes! If you’re short on time, a boxed cake mix works just fine. Just make sure to:
- ✔️ Use less liquid than instructed to make the cake sturdier.
- ✔️ Add an extra egg to improve structure.
- ✔️ Refrigerate the cake before carving for easier shaping.
👉 Pro Tip: Enhance a boxed mix by replacing water with milk and adding a teaspoon of vanilla extract for a richer taste!
What Type of Frosting Works Best for a Butterfly Cake?
The best frosting depends on your design preference.
- ✔️ Buttercream Frosting – Great for piping and vibrant colors.
- ✔️ Whipped Cream Frosting – Lighter but less stable for shaping.
- ✔️ Fondant – Best for a polished, professional look.
👉 Tip: If you want a mix of textures, cover the cake with buttercream and use fondant for details!
How Can I Prevent the Cake from Crumbling While Carving?
Shaping the cake can get tricky if it’s too soft. Try these tips:
- ✔️ Chill the cake for at least 1 hour before cutting.
- ✔️ Use a serrated knife for smooth cuts.
- ✔️ Work slowly and cut small pieces at a time.
👉 Pro Tip: Freeze the cake for 15-20 minutes before carving for extra precision!
Is It Possible to Make a Butterfly Cake Without Special Pans?
Absolutely! You don’t need a fancy butterfly-shaped pan.
✔️ Two Round Cakes Method – Cut each round cake in half and arrange the pieces into wings.
✔️ One Square Cake Method – Carve a butterfly shape from a single large cake.
👉 Bonus: You can also use cupcakes to form mini butterfly wing designs!
How Far in Advance Can I Prepare the Cake Before an Event?
You can prepare parts of the cake ahead of time to save effort on the big day.
- ✔️ Baking the Cake: 1-2 days in advance, stored in an airtight container.
- ✔️ Shaping and Assembling: 1 day before decorating.
- ✔️ Decorating: Best done on the same day for freshness.
👉 Pro Tip: If storing overnight, keep the cake in the fridge and let it sit at room temperature for 30 minutes before serving!
What Are Some Alternative Decoration Ideas for a Butterfly Cake?
Want to customize your butterfly cake even more? Try these ideas:
🎨 Gradient Colors: Blend two shades together for a beautiful ombré effect.
🌿 Nature-Inspired: Add edible flowers, leaves, or vines for a garden look.
🦋 Metallic Accents: Use edible gold or silver dust for a magical touch.
🍫 Chocolate Wings: Pipe melted chocolate into delicate lace-like patterns.
Part 7: Final Thoughts and Presentation Tips for Your Butterfly Cake 🎂🦋
Now that you’ve successfully baked, shaped, and decorated your butterfly cake, it’s time to present it beautifully! The right presentation enhances the visual appeal and makes your cake even more stunning. Follow these final tips to showcase your masterpiece.

How to Present Your Butterfly Cake in a Stunning Way
- ✔️ Choose a decorative cake board – A colorful or patterned cake board complements the butterfly design.
- ✔️ Use a raised cake stand – Elevate your cake for a more elegant display.
- ✔️ Surround with edible decorations – Arrange fresh fruit, edible flowers, or sprinkles around the cake for added charm.
- ✔️ Add themed table decor – If serving at a party, match your cake with butterfly-themed plates and napkins.
👉 Bonus Idea: Place the cake on a green fondant-covered board to create a “butterfly in a garden” effect!
Best Ways to Serve Your Butterfly Cake
- ✔️ Use a sharp, clean knife – Cut with precision to maintain the design.
- ✔️ Chill before slicing – A slightly firm cake holds its shape better when cutting.
- ✔️ Offer different frosting options – Serve extra buttercream or fruit sauce on the side.
- ✔️ Pair with light beverages – Milk, tea, or fruit-infused water complement the flavors.
👉 Pro Tip: If serving at an outdoor event, keep the cake in a cool, shaded area to prevent melting!
Encouragement and Final Thoughts
Creating a butterfly-shaped cake is a fun and rewarding experience. With a little patience and creativity, you can craft a beautiful cake that looks as good as it tastes.
- ✔️ Whether for a birthday, baby shower, or spring gathering, your butterfly cake will be a stunning centerpiece that impresses everyone!
- ✔️ Don’t be afraid to experiment with colors, decorations, and flavors to make the cake unique to your celebration.
- ✔️ Most importantly, have fun and enjoy the process—baking is an art, and your creation is one-of-a-kind!
Your butterfly cake is now ready to take center stage! 🎉🦋 Share your baking success, and don’t forget to snap some pictures before serving!
If you have any more baking questions, let me know. Happy baking! 🎂✨