
How to Make a Heart-Shaped Cake Without a Special Pan
Everyone loves a beautifully crafted heart-shaped cake, especially for romantic occasions or celebrations with loved ones. But what if you don’t have a heart-shaped pan? No worries! With a little creativity and the right techniques, you can easily create one using standard baking tools. In this detailed guide, you’ll learn multiple methods, step-by-step instructions, and expert tips to craft the perfect heart-shaped cake without investing in a special pan. Let’s dive in!
Part 1: Introduction
Introduction to Heart-Shaped Cakes
A heart-shaped cake is a timeless symbol of love and affection, making it a popular choice for occasions like Valentine’s Day, anniversaries, weddings, and birthdays. While many assume a special pan is necessary, you can achieve the same beautiful shape using everyday kitchen essentials.
Homemade cakes add a personal touch to celebrations, and the best part? You have full control over the flavors, ingredients, and decorations. Plus, learning how to make one from scratch means you’ll never be limited by the tools you own!
Challenges Without a Special Pan
You might be wondering, “Is it difficult to make a heart-shaped cake without a dedicated pan?” The good news is—it’s not! However, there are a few challenges:
- Achieving the perfect symmetrical shape – Cutting and assembling cake pieces requires precision.
- Ensuring stability – A heart shape can be fragile, so proper frosting techniques are essential.
- Even baking – Using different pans may lead to varied baking times.
But don’t worry! We’ll guide you through practical and foolproof methods to overcome these challenges. Keep reading, and you’ll soon master the art of making a heart-shaped cake without a special pan.
Part 2: Methods to Create a Heart-Shaped Cake Without a Special Pan
Creating a heart-shaped cake without a special pan is simpler than you might think. You can use standard round and square pans, carve a heart from a single round cake, or arrange cupcakes into a heart shape. Below, you’ll find three foolproof methods to achieve the perfect heart shape with ease.
Method 1: Using Square and Round Pans
This is one of the easiest and most effective ways to make a heart-shaped cake. By combining a round and a square cake, you can effortlessly shape them into a heart.
What You’ll Need:
- 1 8-inch square cake pan
- 1 8-inch round cake pan
- Cake batter of your choice
- Sharp knife
- Cake board or serving plate
- Frosting for decoration
Step-by-Step Instructions:
- Prepare the Batter – Choose your favorite cake recipe and prepare the batter. Divide it equally between the square and round pans.
- Bake the Cakes – Preheat the oven and bake according to the recipe instructions. Check for doneness by inserting a toothpick—if it comes out clean, your cakes are ready.
- Cool the Cakes – Let them cool completely on a wire rack before assembling.
- Cut the Round Cake – Once cooled, cut the round cake in half to create two equal semicircles.
- Arrange the Pieces – Place the square cake on your cake board like a diamond. Position each semicircle on the top two sides of the square to form a heart.
- Secure with Frosting – Apply a thin layer of frosting between the pieces to hold them together.
- Crumb Coat and Decorate – Apply a thin crumb coat, then add your final frosting layer. Decorate with sprinkles, fruits, or piping techniques.
Tip: Chill the cakes for 15–20 minutes before cutting for cleaner edges!
For an illustrated guide on this method, check out this step-by-step tutorial.
Method 2: Carving a Heart from a Single Round Cake
If you only have a round cake pan, don’t worry! You can carve a perfect heart shape using a simple template.
What You’ll Need:
- 1 large round cake (9-inch or 10-inch pan)
- Parchment paper
- Sharp knife
- Cake board
- Frosting and decorations
Step-by-Step Instructions:
- Bake and Cool the Cake – Prepare and bake your cake in a round pan, then let it cool completely.
- Create a Heart Template – Fold a sheet of parchment paper in half. Draw half of a heart shape along the folded edge and cut it out. When you unfold the paper, you’ll have a symmetrical heart template.
- Place the Template – Lay the parchment heart over the cake and use a knife to carefully cut around the edges.
- Refine the Shape – Gently trim any uneven edges to smooth out the heart shape.
- Apply the Frosting – Start with a crumb coat, chill for a few minutes, then apply the final layer of frosting.
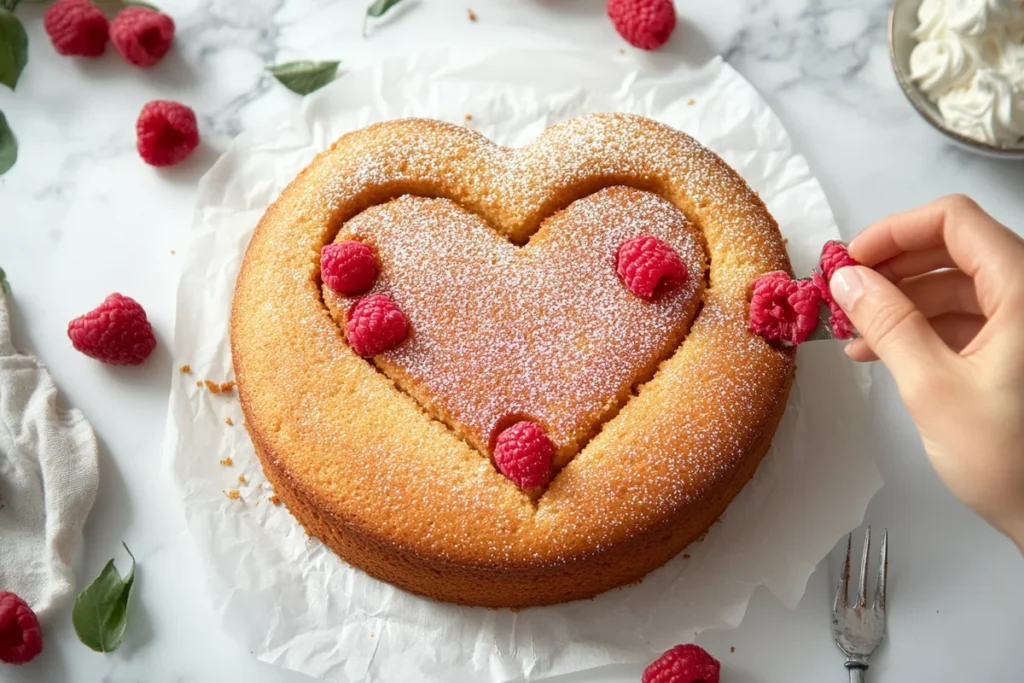
- Decorate – Add piping, sprinkles, fresh fruit, or edible flowers for a stunning look.
Tip: Use a serrated knife for more control when carving your cake!
For more carving techniques, check out this cake shaping guide.
Method 3: Using Cupcakes to Form a Heart
Want a fun and shareable alternative? Cupcakes can be arranged into a heart shape without any cutting or carving!
What You’ll Need:
- 12 to 15 cupcakes
- Cake board
- Frosting
- Piping bag and spatula
Step-by-Step Instructions:
- Bake Cupcakes – Prepare your favorite cupcake batter and bake as usual. Let them cool completely.
- Arrange in a Heart Shape – Start by placing a row of cupcakes in a “V” shape at the bottom. Build out the heart by adding cupcakes in curved rows at the top.
- Secure with Frosting – Pipe a generous amount of frosting over the cupcakes. Use a spatula to smooth it out for a seamless heart look.
- Decorate – Add sprinkles, chocolate shavings, or fruit to enhance the design.
Tip: Use mini cupcakes for a more detailed heart shape!
These three methods allow you to create a heart-shaped cake with tools you already have at home. Choose the one that best fits your needs, and let’s move on to baking and assembling your masterpiece!
Part 3: Baking and Assembling the Heart-Shaped Cake
Now that you’ve chosen a method, it’s time to bake your cake and bring the heart shape to life. The key to success lies in using the right recipe, ensuring even baking, and assembling the cake properly. Let’s go step by step!
Baking the Cake
Choosing the Right Recipe
A sturdy cake works best for shaping and frosting. Softer cakes may crumble, making assembly difficult. Ideal options include:
- Classic vanilla sponge – Light but firm enough for shaping.
- Chocolate cake – Moist yet sturdy, perfect for carving.
- Red velvet cake – Great for a Valentine’s Day-themed heart cake.
Tip: Avoid overly soft cakes like angel food or chiffon, as they may not hold their shape well.
Preparing the Batter
Once you’ve chosen a recipe, follow these key steps:
- Measure Ingredients Precisely – Use a kitchen scale for accuracy.
- Mix the Batter Evenly – Overmixing can make the cake dense, while undermixing leaves lumps.
- Grease and Line the Pans – Grease with butter or oil and line with parchment paper to prevent sticking.
- Divide the Batter Properly – If using the square-and-round pan method, ensure even distribution for equal baking.
Baking Tips for Even Cooking
- Preheat the Oven – Always preheat to the correct temperature before baking.
- Check for Doneness – Insert a toothpick in the center; if it comes out clean, it’s done.
- Rotate Pans if Needed – If your oven has hot spots, rotate the pans halfway through baking.
Once baked, let the cakes cool in the pans for 10 minutes, then transfer to a wire rack to cool completely.
Tip: Chilling the cakes for 30 minutes makes cutting and shaping easier!
Assembling the Heart-Shaped Cake
Step 1: Leveling the Cakes
To create a professional-looking cake, trim off the domed tops. A flat surface ensures stability when stacking and decorating.
- Use a serrated knife or cake leveler.
- Slice off the rounded tops to create an even surface.
- Brush away any loose crumbs.
Step 2: Arranging the Pieces
Depending on the method you chose:
- Square-and-round method – Position the square cake as a diamond, then place the two semicircles at the top.
- Carved heart method – Follow the cutout template and refine the shape.
- Cupcake method – Arrange cupcakes tightly in a heart shape.
Tip: Assemble on a cake board or serving plate before frosting to avoid messy transfers.
Step 3: Securing the Shape
To keep the pieces from shifting:
- Apply a thin layer of frosting between the sections.
- Press them gently together to hold the heart shape.
- Use a crumb coat (a thin layer of frosting) to seal in loose crumbs before the final frosting layer.
Once secured, refrigerate the cake for 20 minutes before moving to the next step.
With your cake baked and assembled, it’s time for the fun part—frosting and decorating!
Part 4: Frosting and Decorating the Heart-Shaped Cake
Now that your heart-shaped cake is fully assembled, it’s time to bring it to life with frosting and decorations! The right frosting technique ensures a smooth, professional finish, while creative decorations make your cake stand out. Let’s dive into the details.
Crumb Coating: The Secret to a Smooth Finish
Before applying the final layer of frosting, it’s essential to crumb coat the cake. This thin layer of frosting traps any loose crumbs, creating a smooth surface for decoration.
How to Apply a Crumb Coat:
- Use a Thin Layer of Frosting – Spread a light coat of frosting over the entire cake using an offset spatula.
- Smooth Out the Surface – Use a bench scraper or spatula to even out the frosting.
- Chill the Cake – Refrigerate for 20–30 minutes to let the crumb coat set.
Tip: A chilled cake is easier to frost evenly without pulling crumbs into the final layer!
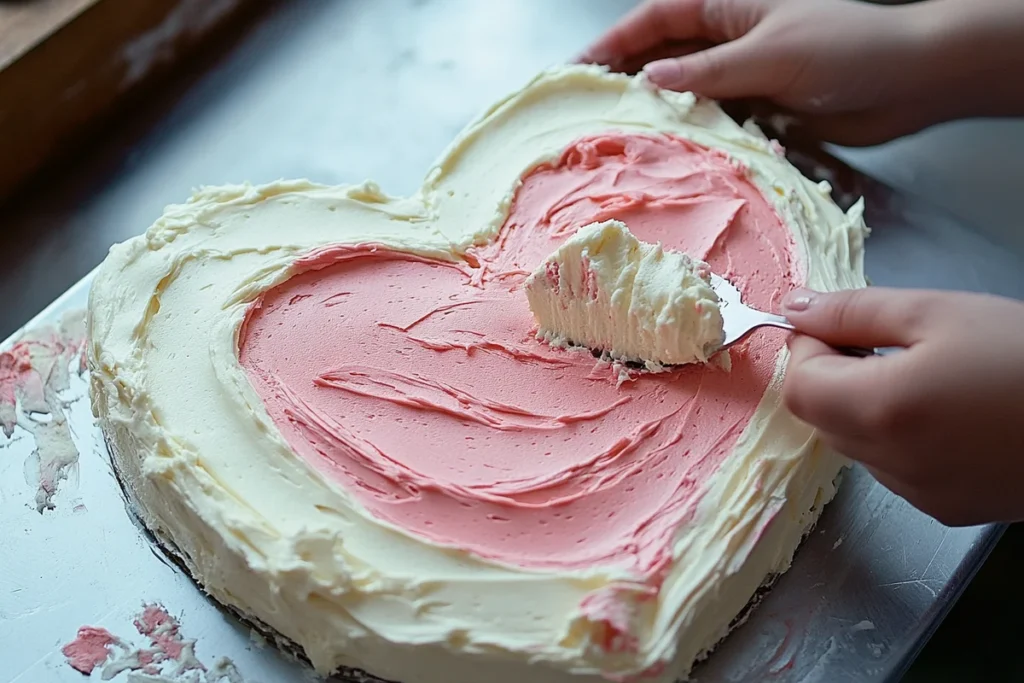
Applying the Final Layer of Frosting
Now that the crumb coat is set, you’re ready to add the final layer of frosting. Choose a buttercream, cream cheese frosting, or whipped ganache, depending on your cake flavor.
Step-by-Step Frosting Guide:
- Start with the Sides – Spread frosting evenly along the cake’s sides with a spatula.
- Move to the Top – Apply a generous amount and spread outward from the center.
- Smooth It Out – Use a bench scraper for clean edges, or create a textured look with a spatula.
Tip: For a professional touch, dip your spatula in warm water and smooth out the frosting in one motion.
Decorative Ideas for a Stunning Cake
Piping Designs
Use a piping bag to create intricate designs on your heart-shaped cake. Popular techniques include:
- Rosettes – Pipe swirls using a star tip for a romantic effect.
- Ruffles – Layered piping for a delicate, elegant look.
- Pearl Borders – Small dots piped along the edges for a clean finish.
Using Fondant for a Polished Look
Fondant creates a sleek, smooth surface and allows for detailed decorations. Here’s how to apply it:
- Roll Out the Fondant – Dust your work surface with powdered sugar and roll to about ¼-inch thickness.
- Drape Over the Cake – Carefully place the fondant over the cake, starting from the center.
- Smooth and Trim – Use a fondant smoother to remove air bubbles, then trim any excess.
Tip: Add fondant cutouts like hearts, flowers, or initials for a customized look!
Natural Decorations: Simple Yet Elegant
If you prefer a more natural look, consider these decoration ideas:
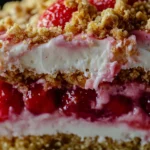
- Fresh berries – Strawberries, raspberries, or blueberries for a vibrant pop of color.
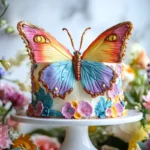
- Edible flowers – Roses, violets, or pansies for a delicate, floral touch.
- Shaved chocolate – Sprinkle white or dark chocolate shavings for an elegant finish.
Theme-Based Decorations
Want to customize your cake for a specific occasion? Try these ideas:
- Valentine’s Day – Red and pink frosting with heart-shaped sprinkles.
- Anniversaries – Elegant gold accents or personalized messages.
- Birthdays – Colorful designs, number candles, or themed cake toppers.
Tip: Get creative with edible glitter, gold leaf, or marbled fondant for an extra wow factor!
Now that your cake is frosted and decorated, it’s time to explore some common mistakes and troubleshooting tips to ensure success.
Part 5: Common Mistakes and Troubleshooting Tips
Even with careful preparation, small mistakes can happen when making a heart-shaped cake. But don’t worry! Here, we’ll cover the most common issues and how to fix them so your cake turns out perfect every time.
Common Mistakes to Avoid
1. Uneven Layers
If your cake layers are uneven, the heart shape may look lopsided.
How to Fix It:
- Use a serrated knife or cake leveler to trim the top and create a flat surface.
- Always check that your oven is level to avoid uneven baking.
- If one layer is thicker than the other, add a little extra frosting between layers to even things out.
2. Cake Crumbles When Cutting
If your cake falls apart while carving, it might be too soft or warm.
How to Fix It:
- Let the cake cool completely before cutting. Warm cakes crumble easily.
- Chill the cake in the fridge for 30 minutes before carving.
- Use a sharp serrated knife and cut gently in smooth motions instead of pressing down hard.
Tip: Freezing the cake for an hour makes cutting even easier!
3. Frosting Won’t Stick to the Cake
If the frosting slides off or doesn’t spread evenly, your cake may be too moist, or the frosting may be too thick.
How to Fix It:
- Apply a thin crumb coat first, then chill the cake before adding more frosting.
- If the frosting is too thick, add a teaspoon of milk or cream to thin it slightly.
- If the cake is too moist, lightly dust it with powdered sugar before frosting.
4. Cake Pieces Don’t Hold Together
When assembling a heart-shaped cake using multiple pieces, they might shift or separate.
How to Fix It:
- Use frosting as “glue” between the cake sections.
- Press the pieces together firmly before applying frosting.
- Refrigerate the cake for at least 20 minutes after assembling to let it set.
5. The Heart Shape Looks Uneven
Sometimes, after cutting and assembling, the cake may not look like a perfect heart.
How to Fix It:
- Gently reshape the edges with a sharp knife.
- Adjust the placement of the round cake halves in the square-and-round method.
- Cover imperfections with frosting, piping, or decorations.
Tip: If one side is larger than the other, use extra frosting to even it out instead of trimming too much cake!
Quick Troubleshooting Chart
| Problem | Cause | Solution |
|---|---|---|
| Cake is lopsided | Uneven layers | Trim layers before assembling |
| Cake crumbles when cutting | Too warm or soft | Chill before cutting |
| Frosting slides off | Too thick frosting or moist cake | Thin frosting or crumb-coat first |
| Cake pieces separate | Not enough frosting “glue” | Add frosting between layers |
| Uneven heart shape | Misaligned pieces | Adjust placement before frosting |
With these tips, your cake will look and taste amazing! Now, let’s explore fun and creative ways to decorate your heart-shaped cake for any special occasion.
Part 6: Alternative Decoration Ideas for a Heart-Shaped Cake
Now that your heart-shaped cake is perfectly assembled and frosted, it’s time to get creative with decorations! Whether you prefer an elegant, minimalist look or a bold, colorful design, the right decorations can elevate your cake to the next level.

1. Fondant Decorations for a Smooth Finish
Fondant gives cakes a professional, polished look. You can cover the entire cake with fondant or use it to create decorative accents.
How to Cover the Cake with Fondant:
- Roll out the fondant – Dust your surface with powdered sugar and roll to about ¼-inch thickness.
- Drape over the cake – Carefully place the fondant over the cake, starting from the center.
- Smooth and trim – Use a fondant smoother to remove air bubbles and trim excess edges.
Fondant Decoration Ideas:
- Heart cutouts – Use small heart-shaped cutters to make fondant accents.
- Lettering – Spell out names or messages with fondant letters.
- Lace patterns – Emboss fondant with lace patterns for a vintage look.
Tip: If fondant is too stiff, knead it with a bit of shortening for better flexibility!
2. Piping Techniques for a Bakery-Style Look
If you love working with buttercream, piping is an easy way to add texture and detail.
Popular Piping Techniques:
- Rosettes – Pipe swirls using a star tip for a soft, floral effect.
- Ruffles – Create elegant waves for a dramatic look.
- Pearl Borders – Pipe small dots along the edges for a clean, classic finish.
Tip: Use two-toned buttercream in a piping bag for a beautiful ombré effect!
3. Using Natural Decorations for a Fresh Look
Sometimes, simple decorations create the most beautiful cakes.
Fresh Fruits:
- Strawberries & raspberries – Perfect for a vibrant, romantic feel.
- Blueberries & blackberries – Great for a contrast in color.
- Sliced kiwis or oranges – Adds a fresh, tropical touch.
Edible Flowers:
- Roses, violets, or pansies – Adds elegance and charm.
- Lavender or chamomile – Subtle floral accents with a light fragrance.
Tip: Ensure any flowers used are pesticide-free and food-safe!
4. Chocolate Decorations for a Decadent Touch
Chocolate lovers can take their cake to the next level with chocolate-based decorations.
Easy Chocolate Decoration Ideas:
- Chocolate shavings – Grate dark or white chocolate over the cake for a delicate finish.
- Chocolate drips – Drizzle melted chocolate down the sides for a trendy drip effect.
- Chocolate hearts – Pipe melted chocolate into heart shapes and let them harden before placing them on the cake.
Tip: Use tempered chocolate for decorations that stay crisp and shiny!
5. Themed Decorations for Special Occasions
Want to customize your heart-shaped cake for a specific event? Try these ideas!
Valentine’s Day Cake:
- Red and pink frosting swirls.
- Heart-shaped sprinkles.
- “Love” piped in white chocolate.
Anniversary or Wedding Cake:
- Elegant white or gold accents.
- Monogram initials in fondant.
- Pearl-like buttercream borders.
Birthday Cake:
- Colorful decorations and edible glitter.
- Number candles for milestone birthdays.
- Funfetti sprinkles mixed into the frosting.
Tip: Gold leaf accents can add a luxurious touch for any special occasion!
With these decoration ideas, your heart-shaped cake will be as stunning as it is delicious. Now, let’s move on to the frequently asked questions to address any final details before serving your masterpiece!
Part 7: Frequently Asked Questions (FAQs)
Before you serve your beautifully crafted heart-shaped cake, you might have a few lingering questions. Here are some of the most common ones, along with expert answers to help you perfect your cake-making skills.
1. Can I Use Different Pan Sizes to Make a Heart-Shaped Cake?
Yes! If you don’t have an 8-inch square and round pan, you can adjust the size using whatever you have.
Alternative pan combinations:
- 9-inch round + 9-inch square – Results in a slightly larger heart.
- 6-inch round + 6-inch square – Creates a smaller, single-serving cake.
- Two 9-inch round cakes – Can be stacked and carved into a heart for a taller cake.
Tip: If using different pan sizes, adjust the baking time accordingly to prevent over- or undercooking!
2. How Do I Prevent My Cake from Sticking to the Pan?
To ensure easy removal, follow these steps:
- Grease the pan generously with butter or non-stick spray.
- Line the bottom with parchment paper for extra security.
- Lightly dust with flour or cocoa powder after greasing to create a barrier.
Tip: For chocolate cakes, use cocoa powder instead of flour to prevent white residue on the edges!
3. What Type of Frosting Works Best for a Heart-Shaped Cake?
The best frosting depends on your preference, but here are some ideal choices:
- Buttercream frosting – Easy to spread and pipe, perfect for smooth or textured designs.
- Cream cheese frosting – Rich and tangy, great for red velvet or carrot cake.
- Whipped ganache – Luxurious chocolate finish with a glossy look.
- Whipped cream frosting – Light and airy, but best for cakes served immediately.
Tip: If you want to create sharp edges, use Swiss meringue buttercream for a smooth, firm finish!
4. Can I Make This Cake in Advance?
Yes! You can prepare your cake ahead of time to save effort on the day of serving.
How to store a cake before decorating:
- Up to 24 hours: Wrap the cooled cake layers in plastic wrap and keep them at room temperature.
- Up to 3 days: Store wrapped cakes in the refrigerator.
- Up to 2 months: Freeze cake layers, then thaw overnight in the fridge before frosting.
For a fully frosted cake:
- Refrigerate for up to 2 days.
- Store in an airtight container to prevent it from absorbing odors.
Tip: Always let refrigerated cakes sit at room temperature for 30 minutes before serving for the best texture!
5. How Do I Store Leftover Cake?
To keep your cake fresh after cutting:
- Cover cut edges with plastic wrap to prevent drying out.
- Refrigerate in an airtight container for up to 4 days.
- Freeze individual slices by wrapping them in plastic wrap, then placing them in a freezer bag for up to 2 months.
Tip: To refresh a refrigerated cake slice, microwave it for 10 seconds to restore moisture!
6. Can I Make a Heart-Shaped Ice Cream Cake Without a Special Pan?
Absolutely! Ice cream cakes are easy to shape using the same methods as a regular cake.
How to make a heart-shaped ice cream cake:
- Use a square and round pan – Soften the ice cream and shape it using the same technique as the cake.
- Carve from a round cake – Freeze the ice cream in a round pan, then carve a heart with a knife.
- Layer with cake and freeze – For a structured look, alternate cake and ice cream layers before shaping.
Tip: Use a warm knife to cut cleanly through an ice cream cake!
These FAQs should answer any remaining questions and help you make the perfect heart-shaped cake! Now, let’s wrap things up with final thoughts on how to present and serve your masterpiece.
Part 8: Conclusion – Share the Love with Your Homemade Heart-Shaped Cake
Congratulations! You’ve successfully learned how to make a heart-shaped cake without a special pan. Whether you used the square-and-round pan method, carved a heart from a round cake, or arranged cupcakes into a heart, you now have the skills to create a stunning homemade cake for any special occasion.
Baking is more than just mixing ingredients—it’s about creating memories and sharing love through food. A heart-shaped cake is the perfect way to celebrate with family, friends, or that special someone. With the right techniques, frosting, and decorations, you can transform a simple cake into a masterpiece.
Final Tips for Serving Your Heart Cake:
- Use a sharp knife to slice cleanly through the cake.
- Pair it with whipped cream, fresh fruit, or a scoop of ice cream for an extra treat.
- Store leftovers properly to keep your cake fresh for later.
Now, it’s your turn to get baking! Try out these methods, experiment with flavors and decorations, and most importantly—have fun in the kitchen. Whether it’s for Valentine’s Day, an anniversary, a birthday, or just because, your homemade heart-shaped cake will be a sweet way to spread love and joy.
Happy baking! ❤️🎂

1 thought on “How to Make a Heart-Shaped Cake Without a Special Pan – Easy DIY Guide”